Make
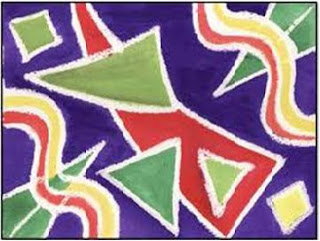
Pattern & Design
Field of activity gives students the opportunity to
understand the various ways to produce a pattern and apply to be a different
design. Patterns
and designs can also be matched to where the outcome of the field activities
such as construction, crafts and so on.
Patterns resulting from the various techniques and methods. Among them through activities such
as:
i. Unplanned
pattern is:
Unplanned pattern produced independently without having a
particular motive. It
can be produced in a manner such as spatter, blow, rolled sieve and others.
Example technique, flow patterns, and patterns stenciled coal reflection
technique.
- Pualaman -

- Blowing -
- using straws and colors to produce patterns through blowing technique.

- Drip -
- dripped wax paper on a flat surface or to produce a pattern, then coated with a sweep of color to make an impact on the droplet.
- Bonding and dyeing -
- using tie and dip either knot ties, folding or stitching. it is also known as rainbow batik.

- Splashing and splashing -
- as a technique in producing the pattern of organized or unorganized manner spatter and splash.
ii. Organized
patterns are:
Organized patterns made using motifs arranged in an
orderly manner and in a certain order.
The motive is to produce a pattern
that has a variety of arrangements, including the use of grid lines in the
production pattern. For
example, the pattern of resis technique, pattern weaving techniques and
patterns using the grid line.
- Paintings -
- make patterns using basic techniques in drawing either with shade ton, drawing lines, drops and rubbing.
- Painting -
- using the media to produce a pattern of planned painting. example of the bricks.

- Print -
- make patterns with either print stencil printing, lithographic printing, print timbulan and others.
- Capan -
- capan method of stamping techniques using natural ingredients to produce a pattern.
- Folding and clipping -
- folding and clipping technique to produce a planned pattern.


- Resis -
- Drawing techniques or design patterns using materials that do not mix with each other like watercolors and oil paints, watercolors and wax and the like that can be said to be the color of the rejection process. This technique can be seen clearly in the process of producing painted batik or batik canting.
- Collage -
- Calligraphy
- using calligraphy or type face as a pattern.


How To make A Frog Mask

You Will Need
- green paper
- yellow paper
- 2 paper plates
- masking tape
- PVA glue
- string
- scissors
- 1 stapler
- 1 marker pen
Method
Cut one of the plates in half, then into quarters. Attach one wedge of the cut up plate to either side of your second plate with masking tape, then round off the edges with your scissors. Round off the other two quarters of the first plate and stick them to the top of the other plate with masking tape.Paint PVA mixed with water onto the mask, then stick on torn up pieces of plain paper. Cover the eyes with yellow paper. Cut away any excess paper when the frog is dry.
Draw on a big mouth and eyes with the black marker pen; then draw on and cut out two big nostrils, which will line up with your own eyes.
Staple each end of the string next to each eye, then tie a knot in the string so the mask stays attached to your head. Tape over the staples with masking tape if they feel uncomfortable.
How to make Milk Carton Easter Bunny Basket

What you'll need:
- Cardboard milk carton (we used a half gallon size)
- White and pink felt
- Milk carton bunny basket template
- White stiff felt
- Cotton ball
- Googly eyes
- Black marker
- Scissors
- Glue
- Scotch tape
- Have an adult cut the milk carton in half (give or take). Recycle the top half – you need the bottom half.
- Cut a strip of white felt that is wide enough to cover the sides of the carton (no need to do the bottom) and long enough to wrap the whole way around. Glue the felt onto the carton. *Note: we used scotch tape to help adhere the felt to the carton while the glue dried to save time.
- Print our template and cut the pieces out. Trace the pieces onto the felt and cut the pieces out. Make sure to use the stiff white felt for the ear pieces or your ears will be quite floppy (which may actually turn out pretty cute!).
- Use scotch tape to stick the ears onto the inside of the milk carton.
- Glue the googly eyes and nose on to the carton. Use the marker to draw on a mouth and whiskers.
- Glue the cotton ball onto the back of the carton as a tail.
- Cut a strip of stiff felt (about 2-3 inches wide) to use as a handle. Glue the handle to the inside of the basket and then use some scotch tape to give it a bit more support to it stays put.
Making Kites
Making Anyaman Ketupat
FRIDAY, 21 DISEMBER 2012
No comments:
Post a Comment